
Remove Gently and Know the Limits
Use the removal method specified by the kit. A water-removable bond should be softened as directed instead of peeled from dry lashes. Pulling a cluster can remove natural lashes and irritate the lid. Give the bond enough time to loosen, then support the surrounding skin while lifting the cluster gently.
Do not rush removal to get ready for bed. A slow, gentle process is easier on the natural lashes than a quick pull.
The AAD recommends replacing makeup according to the product instructions and stopping products that have changed texture or smell or caused irritation. A lash kit that has been contaminated, stored wet, or shared is not worth another use. The makeup brush cleaning guide covers the broader tool-care routine.
Skip DIY clusters when you have an active eye infection, recent eye surgery, persistent dryness, or a known adhesive allergy. Skip them when the application requires pulling the lid, gluing down the waterline, or using a product without clear removal instructions. A professional lash service or a simpler mascara routine is safer when the eye is already reactive.
The semi-halo eyeliner guide shows how a controlled eye detail can change the overall makeup without covering the entire lid. The winter makeup guide follows the same balance: choose one focal feature and keep the surrounding application clean. If the lash kit creates anxiety, pain, or constant checking, it is not the right feature.
Decide Before You Buy
Compare the kit by cluster count, available lengths, bond and remover instructions, and expiration information. A larger set is not a better value if the adhesive dries out or the lengths do not suit your eye shape. A water-removable system may be easier for occasional use, but it still needs a calm, careful removal.
Do a patch test and a one-cluster trial before a full set. Wear it for a short period at home, not to an event where you cannot remove it comfortably. Check for lifting, itching, redness, or a heavy feeling. If the cluster lifts early, use the recommended remover or warm-water method; do not tug at the base.
The decision rule: choose a kit with clear bond and removal instructions, apply it to clean lashes in good light, start with one small cluster, and stop at the first sign of eye pain or irritation. DIY lashes are a cosmetic option, not a permanent extension or an eye treatment.
Updated November 13, 2026. Written and edited by the BeautyPick Lab editorial team. This article summarizes cited public guidance and editorial coverage and does not represent firsthand testing or medical advice.
Sources
- Allure Editors. Falscara Studio Mini Review. Allure, November 11, 2026.
- American Academy of Dermatology. How to Clean Your Makeup Brushes.
- American Academy of Dermatology. When to Toss Your Makeup and Sunscreen.
Understand What the Kit Adds
Traditional strip lashes sit along the upper lash line as one piece. Cluster kits place smaller sections beneath the natural lashes with a bond. The result can look more seamless because the clusters follow the natural lash pattern. Allure describes the Falscara Studio Mini as including three lengths and a water-removable bond that is removed with warm water.
The cosmetic claim is length and volume, not lash growth. A cluster adds temporary density and darkness near the lash line; it does not change the growth cycle or make the natural lash stronger. If lashes are brittle, sparse, or falling out, a cosmetic extension can hide the pattern temporarily but cannot diagnose or treat it.
| Option | What it offers | Main tradeoff | Best fit |
|---|---|---|---|
| Strip lashes | Fast, obvious length and volume | One-piece fit can lift at the corners | A short event and an easy removal plan |
| DIY cluster kit | Customizable placement and smaller sections | Requires patience and careful adhesive control | Occasional wear and a reader comfortable with detail work |
| Salon extensions | Professional application with a longer wear cycle | Higher cost and maintenance appointments | A reader who wants a lower-daily-effort result |
Allure’s kit review is useful for understanding the format, but it does not establish that every user will tolerate the bond. Adhesive ingredients, curing time, and removal method matter. Follow the exact kit directions and test the adhesive on a small area if you have known sensitivities. Never substitute a stronger glue intended for another use.
Build a Clean Application Routine
Clean hands and tools come before placement. The American Academy of Dermatology advises washing makeup brushes every 7 to 10 days and never sharing them. It also recommends rinsing only the tips and drying brushes with the bristles angled downward. A lash applicator is not a brush, but the same principle applies: keep it clean and store it away from moisture and loose powder.
Work in good light with a mirror at eye level. Brush the natural lashes upward, apply the bond only as directed, and place the cluster without touching the eyeball or the inner corner. Start with the shortest length and add volume gradually. If the applicator slips, stop rather than trying to force the cluster into position.
Keep the adhesive away from the waterline and the opening of the eye. Do not apply a cluster if the lid is irritated, the eye is watering heavily, or a contact lens feels uncomfortable. If a product enters the eye, follow the package instructions and seek appropriate medical care rather than rubbing.
Remove Gently and Know the Limits
Use the removal method specified by the kit. A water-removable bond should be softened as directed instead of peeled from dry lashes. Pulling a cluster can remove natural lashes and irritate the lid. Give the bond enough time to loosen, then support the surrounding skin while lifting the cluster gently.
Do not rush removal to get ready for bed. A slow, gentle process is easier on the natural lashes than a quick pull.
The AAD recommends replacing makeup according to the product instructions and stopping products that have changed texture or smell or caused irritation. A lash kit that has been contaminated, stored wet, or shared is not worth another use. The makeup brush cleaning guide covers the broader tool-care routine.
Skip DIY clusters when you have an active eye infection, recent eye surgery, persistent dryness, or a known adhesive allergy. Skip them when the application requires pulling the lid, gluing down the waterline, or using a product without clear removal instructions. A professional lash service or a simpler mascara routine is safer when the eye is already reactive.
The semi-halo eyeliner guide shows how a controlled eye detail can change the overall makeup without covering the entire lid. The winter makeup guide follows the same balance: choose one focal feature and keep the surrounding application clean. If the lash kit creates anxiety, pain, or constant checking, it is not the right feature.
Decide Before You Buy
Compare the kit by cluster count, available lengths, bond and remover instructions, and expiration information. A larger set is not a better value if the adhesive dries out or the lengths do not suit your eye shape. A water-removable system may be easier for occasional use, but it still needs a calm, careful removal.
Do a patch test and a one-cluster trial before a full set. Wear it for a short period at home, not to an event where you cannot remove it comfortably. Check for lifting, itching, redness, or a heavy feeling. If the cluster lifts early, use the recommended remover or warm-water method; do not tug at the base.
The decision rule: choose a kit with clear bond and removal instructions, apply it to clean lashes in good light, start with one small cluster, and stop at the first sign of eye pain or irritation. DIY lashes are a cosmetic option, not a permanent extension or an eye treatment.
Updated November 13, 2026. Written and edited by the BeautyPick Lab editorial team. This article summarizes cited public guidance and editorial coverage and does not represent firsthand testing or medical advice.
Sources
- Allure Editors. Falscara Studio Mini Review. Allure, November 11, 2026.
- American Academy of Dermatology. How to Clean Your Makeup Brushes.
- American Academy of Dermatology. When to Toss Your Makeup and Sunscreen.
Understand What the Kit Adds
Traditional strip lashes sit along the upper lash line as one piece. Cluster kits place smaller sections beneath the natural lashes with a bond. The result can look more seamless because the clusters follow the natural lash pattern. Allure describes the Falscara Studio Mini as including three lengths and a water-removable bond that is removed with warm water.
The cosmetic claim is length and volume, not lash growth. A cluster adds temporary density and darkness near the lash line; it does not change the growth cycle or make the natural lash stronger. If lashes are brittle, sparse, or falling out, a cosmetic extension can hide the pattern temporarily but cannot diagnose or treat it.
| Option | What it offers | Main tradeoff | Best fit |
|---|---|---|---|
| Strip lashes | Fast, obvious length and volume | One-piece fit can lift at the corners | A short event and an easy removal plan |
| DIY cluster kit | Customizable placement and smaller sections | Requires patience and careful adhesive control | Occasional wear and a reader comfortable with detail work |
| Salon extensions | Professional application with a longer wear cycle | Higher cost and maintenance appointments | A reader who wants a lower-daily-effort result |
Allure’s kit review is useful for understanding the format, but it does not establish that every user will tolerate the bond. Adhesive ingredients, curing time, and removal method matter. Follow the exact kit directions and test the adhesive on a small area if you have known sensitivities. Never substitute a stronger glue intended for another use.
Build a Clean Application Routine
Clean hands and tools come before placement. The American Academy of Dermatology advises washing makeup brushes every 7 to 10 days and never sharing them. It also recommends rinsing only the tips and drying brushes with the bristles angled downward. A lash applicator is not a brush, but the same principle applies: keep it clean and store it away from moisture and loose powder.
Work in good light with a mirror at eye level. Brush the natural lashes upward, apply the bond only as directed, and place the cluster without touching the eyeball or the inner corner. Start with the shortest length and add volume gradually. If the applicator slips, stop rather than trying to force the cluster into position.
Keep the adhesive away from the waterline and the opening of the eye. Do not apply a cluster if the lid is irritated, the eye is watering heavily, or a contact lens feels uncomfortable. If a product enters the eye, follow the package instructions and seek appropriate medical care rather than rubbing.
Remove Gently and Know the Limits
Use the removal method specified by the kit. A water-removable bond should be softened as directed instead of peeled from dry lashes. Pulling a cluster can remove natural lashes and irritate the lid. Give the bond enough time to loosen, then support the surrounding skin while lifting the cluster gently.
Do not rush removal to get ready for bed. A slow, gentle process is easier on the natural lashes than a quick pull.
The AAD recommends replacing makeup according to the product instructions and stopping products that have changed texture or smell or caused irritation. A lash kit that has been contaminated, stored wet, or shared is not worth another use. The makeup brush cleaning guide covers the broader tool-care routine.
Skip DIY clusters when you have an active eye infection, recent eye surgery, persistent dryness, or a known adhesive allergy. Skip them when the application requires pulling the lid, gluing down the waterline, or using a product without clear removal instructions. A professional lash service or a simpler mascara routine is safer when the eye is already reactive.
The semi-halo eyeliner guide shows how a controlled eye detail can change the overall makeup without covering the entire lid. The winter makeup guide follows the same balance: choose one focal feature and keep the surrounding application clean. If the lash kit creates anxiety, pain, or constant checking, it is not the right feature.
Decide Before You Buy
Compare the kit by cluster count, available lengths, bond and remover instructions, and expiration information. A larger set is not a better value if the adhesive dries out or the lengths do not suit your eye shape. A water-removable system may be easier for occasional use, but it still needs a calm, careful removal.
Do a patch test and a one-cluster trial before a full set. Wear it for a short period at home, not to an event where you cannot remove it comfortably. Check for lifting, itching, redness, or a heavy feeling. If the cluster lifts early, use the recommended remover or warm-water method; do not tug at the base.
The decision rule: choose a kit with clear bond and removal instructions, apply it to clean lashes in good light, start with one small cluster, and stop at the first sign of eye pain or irritation. DIY lashes are a cosmetic option, not a permanent extension or an eye treatment.
Updated November 13, 2026. Written and edited by the BeautyPick Lab editorial team. This article summarizes cited public guidance and editorial coverage and does not represent firsthand testing or medical advice.
Sources
- Allure Editors. Falscara Studio Mini Review. Allure, November 11, 2026.
- American Academy of Dermatology. How to Clean Your Makeup Brushes.
- American Academy of Dermatology. When to Toss Your Makeup and Sunscreen.
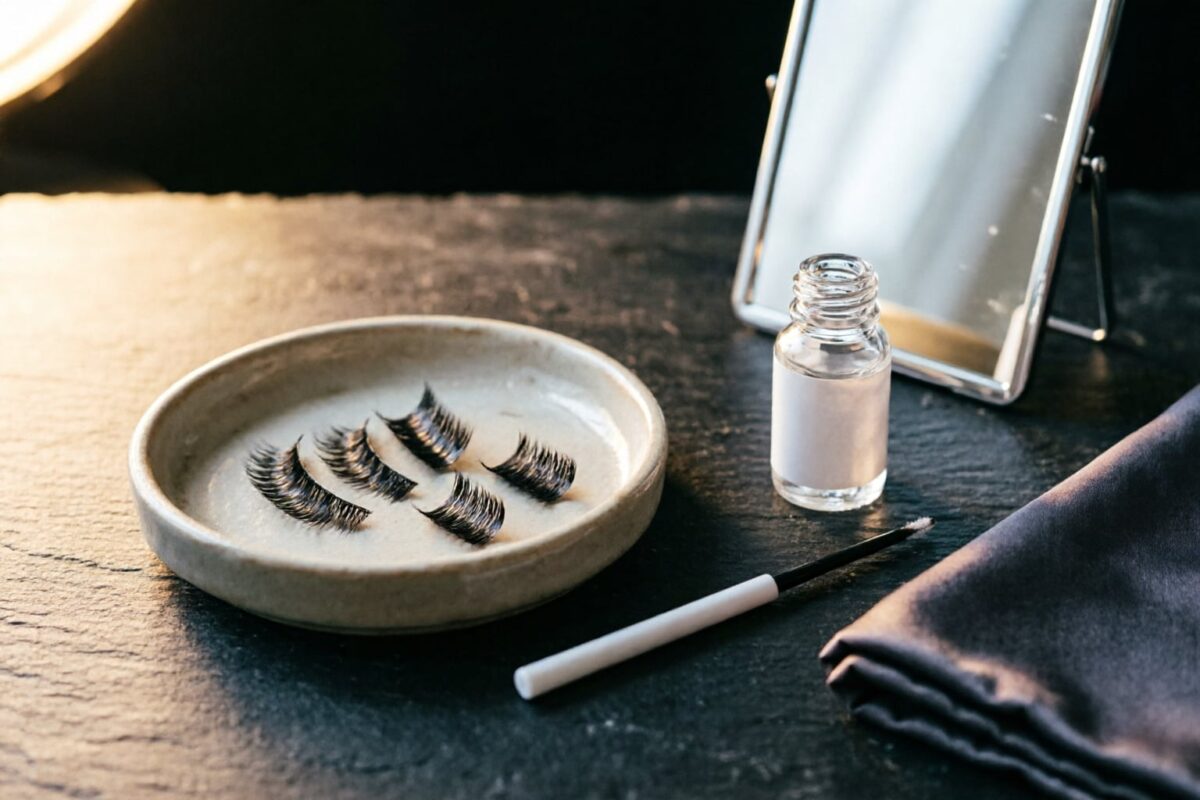
At-home lash extensions are sold as a salon result without the appointment. Allure’s November 11 review describes one compact kit with individual clusters, a bonding formula, a mini applicator, and a water-removable adhesive. The appeal is customization and control. The risk is that the eye area is less forgiving of rushed placement, dirty tools, harsh adhesive, or pulling during removal.
A DIY kit can be a reasonable occasional cosmetic option for someone with steady hands and realistic expectations. It should not be treated as a permanent extension service, a treatment for sparse lashes, or a reason to ignore pain, swelling, or an eye infection. Start with one small cluster at a time and prioritize a clean, removable application over maximum volume.
Understand What the Kit Adds
Traditional strip lashes sit along the upper lash line as one piece. Cluster kits place smaller sections beneath the natural lashes with a bond. The result can look more seamless because the clusters follow the natural lash pattern. Allure describes the Falscara Studio Mini as including three lengths and a water-removable bond that is removed with warm water.
The cosmetic claim is length and volume, not lash growth. A cluster adds temporary density and darkness near the lash line; it does not change the growth cycle or make the natural lash stronger. If lashes are brittle, sparse, or falling out, a cosmetic extension can hide the pattern temporarily but cannot diagnose or treat it.
| Option | What it offers | Main tradeoff | Best fit |
|---|---|---|---|
| Strip lashes | Fast, obvious length and volume | One-piece fit can lift at the corners | A short event and an easy removal plan |
| DIY cluster kit | Customizable placement and smaller sections | Requires patience and careful adhesive control | Occasional wear and a reader comfortable with detail work |
| Salon extensions | Professional application with a longer wear cycle | Higher cost and maintenance appointments | A reader who wants a lower-daily-effort result |
Allure’s kit review is useful for understanding the format, but it does not establish that every user will tolerate the bond. Adhesive ingredients, curing time, and removal method matter. Follow the exact kit directions and test the adhesive on a small area if you have known sensitivities. Never substitute a stronger glue intended for another use.
Build a Clean Application Routine
Clean hands and tools come before placement. The American Academy of Dermatology advises washing makeup brushes every 7 to 10 days and never sharing them. It also recommends rinsing only the tips and drying brushes with the bristles angled downward. A lash applicator is not a brush, but the same principle applies: keep it clean and store it away from moisture and loose powder.
Work in good light with a mirror at eye level. Brush the natural lashes upward, apply the bond only as directed, and place the cluster without touching the eyeball or the inner corner. Start with the shortest length and add volume gradually. If the applicator slips, stop rather than trying to force the cluster into position.
Keep the adhesive away from the waterline and the opening of the eye. Do not apply a cluster if the lid is irritated, the eye is watering heavily, or a contact lens feels uncomfortable. If a product enters the eye, follow the package instructions and seek appropriate medical care rather than rubbing.
Remove Gently and Know the Limits
Use the removal method specified by the kit. A water-removable bond should be softened as directed instead of peeled from dry lashes. Pulling a cluster can remove natural lashes and irritate the lid. Give the bond enough time to loosen, then support the surrounding skin while lifting the cluster gently.
Do not rush removal to get ready for bed. A slow, gentle process is easier on the natural lashes than a quick pull.
The AAD recommends replacing makeup according to the product instructions and stopping products that have changed texture or smell or caused irritation. A lash kit that has been contaminated, stored wet, or shared is not worth another use. The makeup brush cleaning guide covers the broader tool-care routine.
Skip DIY clusters when you have an active eye infection, recent eye surgery, persistent dryness, or a known adhesive allergy. Skip them when the application requires pulling the lid, gluing down the waterline, or using a product without clear removal instructions. A professional lash service or a simpler mascara routine is safer when the eye is already reactive.
The semi-halo eyeliner guide shows how a controlled eye detail can change the overall makeup without covering the entire lid. The winter makeup guide follows the same balance: choose one focal feature and keep the surrounding application clean. If the lash kit creates anxiety, pain, or constant checking, it is not the right feature.
Decide Before You Buy
Compare the kit by cluster count, available lengths, bond and remover instructions, and expiration information. A larger set is not a better value if the adhesive dries out or the lengths do not suit your eye shape. A water-removable system may be easier for occasional use, but it still needs a calm, careful removal.
Do a patch test and a one-cluster trial before a full set. Wear it for a short period at home, not to an event where you cannot remove it comfortably. Check for lifting, itching, redness, or a heavy feeling. If the cluster lifts early, use the recommended remover or warm-water method; do not tug at the base.
The decision rule: choose a kit with clear bond and removal instructions, apply it to clean lashes in good light, start with one small cluster, and stop at the first sign of eye pain or irritation. DIY lashes are a cosmetic option, not a permanent extension or an eye treatment.
Updated November 13, 2026. Written and edited by the BeautyPick Lab editorial team. This article summarizes cited public guidance and editorial coverage and does not represent firsthand testing or medical advice.
Sources
- Allure Editors. Falscara Studio Mini Review. Allure, November 11, 2026.
- American Academy of Dermatology. How to Clean Your Makeup Brushes.
- American Academy of Dermatology. When to Toss Your Makeup and Sunscreen.
Understand What the Kit Adds
Traditional strip lashes sit along the upper lash line as one piece. Cluster kits place smaller sections beneath the natural lashes with a bond. The result can look more seamless because the clusters follow the natural lash pattern. Allure describes the Falscara Studio Mini as including three lengths and a water-removable bond that is removed with warm water.
The cosmetic claim is length and volume, not lash growth. A cluster adds temporary density and darkness near the lash line; it does not change the growth cycle or make the natural lash stronger. If lashes are brittle, sparse, or falling out, a cosmetic extension can hide the pattern temporarily but cannot diagnose or treat it.
| Option | What it offers | Main tradeoff | Best fit |
|---|---|---|---|
| Strip lashes | Fast, obvious length and volume | One-piece fit can lift at the corners | A short event and an easy removal plan |
| DIY cluster kit | Customizable placement and smaller sections | Requires patience and careful adhesive control | Occasional wear and a reader comfortable with detail work |
| Salon extensions | Professional application with a longer wear cycle | Higher cost and maintenance appointments | A reader who wants a lower-daily-effort result |
Allure’s kit review is useful for understanding the format, but it does not establish that every user will tolerate the bond. Adhesive ingredients, curing time, and removal method matter. Follow the exact kit directions and test the adhesive on a small area if you have known sensitivities. Never substitute a stronger glue intended for another use.
Build a Clean Application Routine
Clean hands and tools come before placement. The American Academy of Dermatology advises washing makeup brushes every 7 to 10 days and never sharing them. It also recommends rinsing only the tips and drying brushes with the bristles angled downward. A lash applicator is not a brush, but the same principle applies: keep it clean and store it away from moisture and loose powder.
Work in good light with a mirror at eye level. Brush the natural lashes upward, apply the bond only as directed, and place the cluster without touching the eyeball or the inner corner. Start with the shortest length and add volume gradually. If the applicator slips, stop rather than trying to force the cluster into position.
Keep the adhesive away from the waterline and the opening of the eye. Do not apply a cluster if the lid is irritated, the eye is watering heavily, or a contact lens feels uncomfortable. If a product enters the eye, follow the package instructions and seek appropriate medical care rather than rubbing.
Remove Gently and Know the Limits
Use the removal method specified by the kit. A water-removable bond should be softened as directed instead of peeled from dry lashes. Pulling a cluster can remove natural lashes and irritate the lid. Give the bond enough time to loosen, then support the surrounding skin while lifting the cluster gently.
Do not rush removal to get ready for bed. A slow, gentle process is easier on the natural lashes than a quick pull.
The AAD recommends replacing makeup according to the product instructions and stopping products that have changed texture or smell or caused irritation. A lash kit that has been contaminated, stored wet, or shared is not worth another use. The makeup brush cleaning guide covers the broader tool-care routine.
Skip DIY clusters when you have an active eye infection, recent eye surgery, persistent dryness, or a known adhesive allergy. Skip them when the application requires pulling the lid, gluing down the waterline, or using a product without clear removal instructions. A professional lash service or a simpler mascara routine is safer when the eye is already reactive.
The semi-halo eyeliner guide shows how a controlled eye detail can change the overall makeup without covering the entire lid. The winter makeup guide follows the same balance: choose one focal feature and keep the surrounding application clean. If the lash kit creates anxiety, pain, or constant checking, it is not the right feature.
Decide Before You Buy
Compare the kit by cluster count, available lengths, bond and remover instructions, and expiration information. A larger set is not a better value if the adhesive dries out or the lengths do not suit your eye shape. A water-removable system may be easier for occasional use, but it still needs a calm, careful removal.
Do a patch test and a one-cluster trial before a full set. Wear it for a short period at home, not to an event where you cannot remove it comfortably. Check for lifting, itching, redness, or a heavy feeling. If the cluster lifts early, use the recommended remover or warm-water method; do not tug at the base.
The decision rule: choose a kit with clear bond and removal instructions, apply it to clean lashes in good light, start with one small cluster, and stop at the first sign of eye pain or irritation. DIY lashes are a cosmetic option, not a permanent extension or an eye treatment.
Updated November 13, 2026. Written and edited by the BeautyPick Lab editorial team. This article summarizes cited public guidance and editorial coverage and does not represent firsthand testing or medical advice.
Sources
- Allure Editors. Falscara Studio Mini Review. Allure, November 11, 2026.
- American Academy of Dermatology. How to Clean Your Makeup Brushes.
- American Academy of Dermatology. When to Toss Your Makeup and Sunscreen.
At-home lash extensions are sold as a salon result without the appointment. Allure’s November 11 review describes one compact kit with individual clusters, a bonding formula, a mini applicator, and a water-removable adhesive. The appeal is customization and control. The risk is that the eye area is less forgiving of rushed placement, dirty tools, harsh adhesive, or pulling during removal.
A DIY kit can be a reasonable occasional cosmetic option for someone with steady hands and realistic expectations. It should not be treated as a permanent extension service, a treatment for sparse lashes, or a reason to ignore pain, swelling, or an eye infection. Start with one small cluster at a time and prioritize a clean, removable application over maximum volume.
Understand What the Kit Adds
Traditional strip lashes sit along the upper lash line as one piece. Cluster kits place smaller sections beneath the natural lashes with a bond. The result can look more seamless because the clusters follow the natural lash pattern. Allure describes the Falscara Studio Mini as including three lengths and a water-removable bond that is removed with warm water.
The cosmetic claim is length and volume, not lash growth. A cluster adds temporary density and darkness near the lash line; it does not change the growth cycle or make the natural lash stronger. If lashes are brittle, sparse, or falling out, a cosmetic extension can hide the pattern temporarily but cannot diagnose or treat it.
| Option | What it offers | Main tradeoff | Best fit |
|---|---|---|---|
| Strip lashes | Fast, obvious length and volume | One-piece fit can lift at the corners | A short event and an easy removal plan |
| DIY cluster kit | Customizable placement and smaller sections | Requires patience and careful adhesive control | Occasional wear and a reader comfortable with detail work |
| Salon extensions | Professional application with a longer wear cycle | Higher cost and maintenance appointments | A reader who wants a lower-daily-effort result |
Allure’s kit review is useful for understanding the format, but it does not establish that every user will tolerate the bond. Adhesive ingredients, curing time, and removal method matter. Follow the exact kit directions and test the adhesive on a small area if you have known sensitivities. Never substitute a stronger glue intended for another use.
Build a Clean Application Routine
Clean hands and tools come before placement. The American Academy of Dermatology advises washing makeup brushes every 7 to 10 days and never sharing them. It also recommends rinsing only the tips and drying brushes with the bristles angled downward. A lash applicator is not a brush, but the same principle applies: keep it clean and store it away from moisture and loose powder.
Work in good light with a mirror at eye level. Brush the natural lashes upward, apply the bond only as directed, and place the cluster without touching the eyeball or the inner corner. Start with the shortest length and add volume gradually. If the applicator slips, stop rather than trying to force the cluster into position.
Keep the adhesive away from the waterline and the opening of the eye. Do not apply a cluster if the lid is irritated, the eye is watering heavily, or a contact lens feels uncomfortable. If a product enters the eye, follow the package instructions and seek appropriate medical care rather than rubbing.
Remove Gently and Know the Limits
Use the removal method specified by the kit. A water-removable bond should be softened as directed instead of peeled from dry lashes. Pulling a cluster can remove natural lashes and irritate the lid. Give the bond enough time to loosen, then support the surrounding skin while lifting the cluster gently.
Do not rush removal to get ready for bed. A slow, gentle process is easier on the natural lashes than a quick pull.
The AAD recommends replacing makeup according to the product instructions and stopping products that have changed texture or smell or caused irritation. A lash kit that has been contaminated, stored wet, or shared is not worth another use. The makeup brush cleaning guide covers the broader tool-care routine.
Skip DIY clusters when you have an active eye infection, recent eye surgery, persistent dryness, or a known adhesive allergy. Skip them when the application requires pulling the lid, gluing down the waterline, or using a product without clear removal instructions. A professional lash service or a simpler mascara routine is safer when the eye is already reactive.
The semi-halo eyeliner guide shows how a controlled eye detail can change the overall makeup without covering the entire lid. The winter makeup guide follows the same balance: choose one focal feature and keep the surrounding application clean. If the lash kit creates anxiety, pain, or constant checking, it is not the right feature.
Decide Before You Buy
Compare the kit by cluster count, available lengths, bond and remover instructions, and expiration information. A larger set is not a better value if the adhesive dries out or the lengths do not suit your eye shape. A water-removable system may be easier for occasional use, but it still needs a calm, careful removal.
Do a patch test and a one-cluster trial before a full set. Wear it for a short period at home, not to an event where you cannot remove it comfortably. Check for lifting, itching, redness, or a heavy feeling. If the cluster lifts early, use the recommended remover or warm-water method; do not tug at the base.
The decision rule: choose a kit with clear bond and removal instructions, apply it to clean lashes in good light, start with one small cluster, and stop at the first sign of eye pain or irritation. DIY lashes are a cosmetic option, not a permanent extension or an eye treatment.
Updated November 13, 2026. Written and edited by the BeautyPick Lab editorial team. This article summarizes cited public guidance and editorial coverage and does not represent firsthand testing or medical advice.
Sources
- Allure Editors. Falscara Studio Mini Review. Allure, November 11, 2026.
- American Academy of Dermatology. How to Clean Your Makeup Brushes.
- American Academy of Dermatology. When to Toss Your Makeup and Sunscreen.
Understand What the Kit Adds
Traditional strip lashes sit along the upper lash line as one piece. Cluster kits place smaller sections beneath the natural lashes with a bond. The result can look more seamless because the clusters follow the natural lash pattern. Allure describes the Falscara Studio Mini as including three lengths and a water-removable bond that is removed with warm water.
The cosmetic claim is length and volume, not lash growth. A cluster adds temporary density and darkness near the lash line; it does not change the growth cycle or make the natural lash stronger. If lashes are brittle, sparse, or falling out, a cosmetic extension can hide the pattern temporarily but cannot diagnose or treat it.
| Option | What it offers | Main tradeoff | Best fit |
|---|---|---|---|
| Strip lashes | Fast, obvious length and volume | One-piece fit can lift at the corners | A short event and an easy removal plan |
| DIY cluster kit | Customizable placement and smaller sections | Requires patience and careful adhesive control | Occasional wear and a reader comfortable with detail work |
| Salon extensions | Professional application with a longer wear cycle | Higher cost and maintenance appointments | A reader who wants a lower-daily-effort result |
Allure’s kit review is useful for understanding the format, but it does not establish that every user will tolerate the bond. Adhesive ingredients, curing time, and removal method matter. Follow the exact kit directions and test the adhesive on a small area if you have known sensitivities. Never substitute a stronger glue intended for another use.
Build a Clean Application Routine
Clean hands and tools come before placement. The American Academy of Dermatology advises washing makeup brushes every 7 to 10 days and never sharing them. It also recommends rinsing only the tips and drying brushes with the bristles angled downward. A lash applicator is not a brush, but the same principle applies: keep it clean and store it away from moisture and loose powder.
Work in good light with a mirror at eye level. Brush the natural lashes upward, apply the bond only as directed, and place the cluster without touching the eyeball or the inner corner. Start with the shortest length and add volume gradually. If the applicator slips, stop rather than trying to force the cluster into position.
Keep the adhesive away from the waterline and the opening of the eye. Do not apply a cluster if the lid is irritated, the eye is watering heavily, or a contact lens feels uncomfortable. If a product enters the eye, follow the package instructions and seek appropriate medical care rather than rubbing.
Remove Gently and Know the Limits
Use the removal method specified by the kit. A water-removable bond should be softened as directed instead of peeled from dry lashes. Pulling a cluster can remove natural lashes and irritate the lid. Give the bond enough time to loosen, then support the surrounding skin while lifting the cluster gently.
Do not rush removal to get ready for bed. A slow, gentle process is easier on the natural lashes than a quick pull.
The AAD recommends replacing makeup according to the product instructions and stopping products that have changed texture or smell or caused irritation. A lash kit that has been contaminated, stored wet, or shared is not worth another use. The makeup brush cleaning guide covers the broader tool-care routine.
Skip DIY clusters when you have an active eye infection, recent eye surgery, persistent dryness, or a known adhesive allergy. Skip them when the application requires pulling the lid, gluing down the waterline, or using a product without clear removal instructions. A professional lash service or a simpler mascara routine is safer when the eye is already reactive.
The semi-halo eyeliner guide shows how a controlled eye detail can change the overall makeup without covering the entire lid. The winter makeup guide follows the same balance: choose one focal feature and keep the surrounding application clean. If the lash kit creates anxiety, pain, or constant checking, it is not the right feature.
Decide Before You Buy
Compare the kit by cluster count, available lengths, bond and remover instructions, and expiration information. A larger set is not a better value if the adhesive dries out or the lengths do not suit your eye shape. A water-removable system may be easier for occasional use, but it still needs a calm, careful removal.
Do a patch test and a one-cluster trial before a full set. Wear it for a short period at home, not to an event where you cannot remove it comfortably. Check for lifting, itching, redness, or a heavy feeling. If the cluster lifts early, use the recommended remover or warm-water method; do not tug at the base.
The decision rule: choose a kit with clear bond and removal instructions, apply it to clean lashes in good light, start with one small cluster, and stop at the first sign of eye pain or irritation. DIY lashes are a cosmetic option, not a permanent extension or an eye treatment.
Updated November 13, 2026. Written and edited by the BeautyPick Lab editorial team. This article summarizes cited public guidance and editorial coverage and does not represent firsthand testing or medical advice.
Sources
- Allure Editors. Falscara Studio Mini Review. Allure, November 11, 2026.
- American Academy of Dermatology. How to Clean Your Makeup Brushes.
- American Academy of Dermatology. When to Toss Your Makeup and Sunscreen.
At-home lash extensions are sold as a salon result without the appointment. Allure’s November 11 review describes one compact kit with individual clusters, a bonding formula, a mini applicator, and a water-removable adhesive. The appeal is customization and control. The risk is that the eye area is less forgiving of rushed placement, dirty tools, harsh adhesive, or pulling during removal.
A DIY kit can be a reasonable occasional cosmetic option for someone with steady hands and realistic expectations. It should not be treated as a permanent extension service, a treatment for sparse lashes, or a reason to ignore pain, swelling, or an eye infection. Start with one small cluster at a time and prioritize a clean, removable application over maximum volume.
Understand What the Kit Adds
Traditional strip lashes sit along the upper lash line as one piece. Cluster kits place smaller sections beneath the natural lashes with a bond. The result can look more seamless because the clusters follow the natural lash pattern. Allure describes the Falscara Studio Mini as including three lengths and a water-removable bond that is removed with warm water.
The cosmetic claim is length and volume, not lash growth. A cluster adds temporary density and darkness near the lash line; it does not change the growth cycle or make the natural lash stronger. If lashes are brittle, sparse, or falling out, a cosmetic extension can hide the pattern temporarily but cannot diagnose or treat it.
| Option | What it offers | Main tradeoff | Best fit |
|---|---|---|---|
| Strip lashes | Fast, obvious length and volume | One-piece fit can lift at the corners | A short event and an easy removal plan |
| DIY cluster kit | Customizable placement and smaller sections | Requires patience and careful adhesive control | Occasional wear and a reader comfortable with detail work |
| Salon extensions | Professional application with a longer wear cycle | Higher cost and maintenance appointments | A reader who wants a lower-daily-effort result |
Allure’s kit review is useful for understanding the format, but it does not establish that every user will tolerate the bond. Adhesive ingredients, curing time, and removal method matter. Follow the exact kit directions and test the adhesive on a small area if you have known sensitivities. Never substitute a stronger glue intended for another use.
Build a Clean Application Routine
Clean hands and tools come before placement. The American Academy of Dermatology advises washing makeup brushes every 7 to 10 days and never sharing them. It also recommends rinsing only the tips and drying brushes with the bristles angled downward. A lash applicator is not a brush, but the same principle applies: keep it clean and store it away from moisture and loose powder.
Work in good light with a mirror at eye level. Brush the natural lashes upward, apply the bond only as directed, and place the cluster without touching the eyeball or the inner corner. Start with the shortest length and add volume gradually. If the applicator slips, stop rather than trying to force the cluster into position.
Keep the adhesive away from the waterline and the opening of the eye. Do not apply a cluster if the lid is irritated, the eye is watering heavily, or a contact lens feels uncomfortable. If a product enters the eye, follow the package instructions and seek appropriate medical care rather than rubbing.
Remove Gently and Know the Limits
Use the removal method specified by the kit. A water-removable bond should be softened as directed instead of peeled from dry lashes. Pulling a cluster can remove natural lashes and irritate the lid. Give the bond enough time to loosen, then support the surrounding skin while lifting the cluster gently.
Do not rush removal to get ready for bed. A slow, gentle process is easier on the natural lashes than a quick pull.
The AAD recommends replacing makeup according to the product instructions and stopping products that have changed texture or smell or caused irritation. A lash kit that has been contaminated, stored wet, or shared is not worth another use. The makeup brush cleaning guide covers the broader tool-care routine.
Skip DIY clusters when you have an active eye infection, recent eye surgery, persistent dryness, or a known adhesive allergy. Skip them when the application requires pulling the lid, gluing down the waterline, or using a product without clear removal instructions. A professional lash service or a simpler mascara routine is safer when the eye is already reactive.
The semi-halo eyeliner guide shows how a controlled eye detail can change the overall makeup without covering the entire lid. The winter makeup guide follows the same balance: choose one focal feature and keep the surrounding application clean. If the lash kit creates anxiety, pain, or constant checking, it is not the right feature.
Decide Before You Buy
Compare the kit by cluster count, available lengths, bond and remover instructions, and expiration information. A larger set is not a better value if the adhesive dries out or the lengths do not suit your eye shape. A water-removable system may be easier for occasional use, but it still needs a calm, careful removal.
Do a patch test and a one-cluster trial before a full set. Wear it for a short period at home, not to an event where you cannot remove it comfortably. Check for lifting, itching, redness, or a heavy feeling. If the cluster lifts early, use the recommended remover or warm-water method; do not tug at the base.
The decision rule: choose a kit with clear bond and removal instructions, apply it to clean lashes in good light, start with one small cluster, and stop at the first sign of eye pain or irritation. DIY lashes are a cosmetic option, not a permanent extension or an eye treatment.
Updated November 13, 2026. Written and edited by the BeautyPick Lab editorial team. This article summarizes cited public guidance and editorial coverage and does not represent firsthand testing or medical advice.
Sources
- Allure Editors. Falscara Studio Mini Review. Allure, November 11, 2026.
- American Academy of Dermatology. How to Clean Your Makeup Brushes.
- American Academy of Dermatology. When to Toss Your Makeup and Sunscreen.
Understand What the Kit Adds
Traditional strip lashes sit along the upper lash line as one piece. Cluster kits place smaller sections beneath the natural lashes with a bond. The result can look more seamless because the clusters follow the natural lash pattern. Allure describes the Falscara Studio Mini as including three lengths and a water-removable bond that is removed with warm water.
The cosmetic claim is length and volume, not lash growth. A cluster adds temporary density and darkness near the lash line; it does not change the growth cycle or make the natural lash stronger. If lashes are brittle, sparse, or falling out, a cosmetic extension can hide the pattern temporarily but cannot diagnose or treat it.
| Option | What it offers | Main tradeoff | Best fit |
|---|---|---|---|
| Strip lashes | Fast, obvious length and volume | One-piece fit can lift at the corners | A short event and an easy removal plan |
| DIY cluster kit | Customizable placement and smaller sections | Requires patience and careful adhesive control | Occasional wear and a reader comfortable with detail work |
| Salon extensions | Professional application with a longer wear cycle | Higher cost and maintenance appointments | A reader who wants a lower-daily-effort result |
Allure’s kit review is useful for understanding the format, but it does not establish that every user will tolerate the bond. Adhesive ingredients, curing time, and removal method matter. Follow the exact kit directions and test the adhesive on a small area if you have known sensitivities. Never substitute a stronger glue intended for another use.
Build a Clean Application Routine
Clean hands and tools come before placement. The American Academy of Dermatology advises washing makeup brushes every 7 to 10 days and never sharing them. It also recommends rinsing only the tips and drying brushes with the bristles angled downward. A lash applicator is not a brush, but the same principle applies: keep it clean and store it away from moisture and loose powder.
Work in good light with a mirror at eye level. Brush the natural lashes upward, apply the bond only as directed, and place the cluster without touching the eyeball or the inner corner. Start with the shortest length and add volume gradually. If the applicator slips, stop rather than trying to force the cluster into position.
Keep the adhesive away from the waterline and the opening of the eye. Do not apply a cluster if the lid is irritated, the eye is watering heavily, or a contact lens feels uncomfortable. If a product enters the eye, follow the package instructions and seek appropriate medical care rather than rubbing.
Remove Gently and Know the Limits
Use the removal method specified by the kit. A water-removable bond should be softened as directed instead of peeled from dry lashes. Pulling a cluster can remove natural lashes and irritate the lid. Give the bond enough time to loosen, then support the surrounding skin while lifting the cluster gently.
Do not rush removal to get ready for bed. A slow, gentle process is easier on the natural lashes than a quick pull.
The AAD recommends replacing makeup according to the product instructions and stopping products that have changed texture or smell or caused irritation. A lash kit that has been contaminated, stored wet, or shared is not worth another use. The makeup brush cleaning guide covers the broader tool-care routine.
Skip DIY clusters when you have an active eye infection, recent eye surgery, persistent dryness, or a known adhesive allergy. Skip them when the application requires pulling the lid, gluing down the waterline, or using a product without clear removal instructions. A professional lash service or a simpler mascara routine is safer when the eye is already reactive.
The semi-halo eyeliner guide shows how a controlled eye detail can change the overall makeup without covering the entire lid. The winter makeup guide follows the same balance: choose one focal feature and keep the surrounding application clean. If the lash kit creates anxiety, pain, or constant checking, it is not the right feature.
Decide Before You Buy
Compare the kit by cluster count, available lengths, bond and remover instructions, and expiration information. A larger set is not a better value if the adhesive dries out or the lengths do not suit your eye shape. A water-removable system may be easier for occasional use, but it still needs a calm, careful removal.
Do a patch test and a one-cluster trial before a full set. Wear it for a short period at home, not to an event where you cannot remove it comfortably. Check for lifting, itching, redness, or a heavy feeling. If the cluster lifts early, use the recommended remover or warm-water method; do not tug at the base.
The decision rule: choose a kit with clear bond and removal instructions, apply it to clean lashes in good light, start with one small cluster, and stop at the first sign of eye pain or irritation. DIY lashes are a cosmetic option, not a permanent extension or an eye treatment.
Updated November 13, 2026. Written and edited by the BeautyPick Lab editorial team. This article summarizes cited public guidance and editorial coverage and does not represent firsthand testing or medical advice.
Sources
- Allure Editors. Falscara Studio Mini Review. Allure, November 11, 2026.
- American Academy of Dermatology. How to Clean Your Makeup Brushes.
- American Academy of Dermatology. When to Toss Your Makeup and Sunscreen.
Understand What the Kit Adds
Traditional strip lashes sit along the upper lash line as one piece. Cluster kits place smaller sections beneath the natural lashes with a bond. The result can look more seamless because the clusters follow the natural lash pattern. Allure describes the Falscara Studio Mini as including three lengths and a water-removable bond that is removed with warm water.
The cosmetic claim is length and volume, not lash growth. A cluster adds temporary density and darkness near the lash line; it does not change the growth cycle or make the natural lash stronger. If lashes are brittle, sparse, or falling out, a cosmetic extension can hide the pattern temporarily but cannot diagnose or treat it.
| Option | What it offers | Main tradeoff | Best fit |
|---|---|---|---|
| Strip lashes | Fast, obvious length and volume | One-piece fit can lift at the corners | A short event and an easy removal plan |
| DIY cluster kit | Customizable placement and smaller sections | Requires patience and careful adhesive control | Occasional wear and a reader comfortable with detail work |
| Salon extensions | Professional application with a longer wear cycle | Higher cost and maintenance appointments | A reader who wants a lower-daily-effort result |
Allure’s kit review is useful for understanding the format, but it does not establish that every user will tolerate the bond. Adhesive ingredients, curing time, and removal method matter. Follow the exact kit directions and test the adhesive on a small area if you have known sensitivities. Never substitute a stronger glue intended for another use.
Build a Clean Application Routine
Clean hands and tools come before placement. The American Academy of Dermatology advises washing makeup brushes every 7 to 10 days and never sharing them. It also recommends rinsing only the tips and drying brushes with the bristles angled downward. A lash applicator is not a brush, but the same principle applies: keep it clean and store it away from moisture and loose powder.
Work in good light with a mirror at eye level. Brush the natural lashes upward, apply the bond only as directed, and place the cluster without touching the eyeball or the inner corner. Start with the shortest length and add volume gradually. If the applicator slips, stop rather than trying to force the cluster into position.
Keep the adhesive away from the waterline and the opening of the eye. Do not apply a cluster if the lid is irritated, the eye is watering heavily, or a contact lens feels uncomfortable. If a product enters the eye, follow the package instructions and seek appropriate medical care rather than rubbing.
Remove Gently and Know the Limits
Use the removal method specified by the kit. A water-removable bond should be softened as directed instead of peeled from dry lashes. Pulling a cluster can remove natural lashes and irritate the lid. Give the bond enough time to loosen, then support the surrounding skin while lifting the cluster gently.
Do not rush removal to get ready for bed. A slow, gentle process is easier on the natural lashes than a quick pull.
The AAD recommends replacing makeup according to the product instructions and stopping products that have changed texture or smell or caused irritation. A lash kit that has been contaminated, stored wet, or shared is not worth another use. The makeup brush cleaning guide covers the broader tool-care routine.
Skip DIY clusters when you have an active eye infection, recent eye surgery, persistent dryness, or a known adhesive allergy. Skip them when the application requires pulling the lid, gluing down the waterline, or using a product without clear removal instructions. A professional lash service or a simpler mascara routine is safer when the eye is already reactive.
The semi-halo eyeliner guide shows how a controlled eye detail can change the overall makeup without covering the entire lid. The winter makeup guide follows the same balance: choose one focal feature and keep the surrounding application clean. If the lash kit creates anxiety, pain, or constant checking, it is not the right feature.
Decide Before You Buy
Compare the kit by cluster count, available lengths, bond and remover instructions, and expiration information. A larger set is not a better value if the adhesive dries out or the lengths do not suit your eye shape. A water-removable system may be easier for occasional use, but it still needs a calm, careful removal.
Do a patch test and a one-cluster trial before a full set. Wear it for a short period at home, not to an event where you cannot remove it comfortably. Check for lifting, itching, redness, or a heavy feeling. If the cluster lifts early, use the recommended remover or warm-water method; do not tug at the base.
The decision rule: choose a kit with clear bond and removal instructions, apply it to clean lashes in good light, start with one small cluster, and stop at the first sign of eye pain or irritation. DIY lashes are a cosmetic option, not a permanent extension or an eye treatment.
Updated November 13, 2026. Written and edited by the BeautyPick Lab editorial team. This article summarizes cited public guidance and editorial coverage and does not represent firsthand testing or medical advice.
Sources
- Allure Editors. Falscara Studio Mini Review. Allure, November 11, 2026.
- American Academy of Dermatology. How to Clean Your Makeup Brushes.
- American Academy of Dermatology. When to Toss Your Makeup and Sunscreen.
At-home lash extensions are sold as a salon result without the appointment. Allure’s November 11 review describes one compact kit with individual clusters, a bonding formula, a mini applicator, and a water-removable adhesive. The appeal is customization and control. The risk is that the eye area is less forgiving of rushed placement, dirty tools, harsh adhesive, or pulling during removal.
A DIY kit can be a reasonable occasional cosmetic option for someone with steady hands and realistic expectations. It should not be treated as a permanent extension service, a treatment for sparse lashes, or a reason to ignore pain, swelling, or an eye infection. Start with one small cluster at a time and prioritize a clean, removable application over maximum volume.
Understand What the Kit Adds
Traditional strip lashes sit along the upper lash line as one piece. Cluster kits place smaller sections beneath the natural lashes with a bond. The result can look more seamless because the clusters follow the natural lash pattern. Allure describes the Falscara Studio Mini as including three lengths and a water-removable bond that is removed with warm water.
The cosmetic claim is length and volume, not lash growth. A cluster adds temporary density and darkness near the lash line; it does not change the growth cycle or make the natural lash stronger. If lashes are brittle, sparse, or falling out, a cosmetic extension can hide the pattern temporarily but cannot diagnose or treat it.
| Option | What it offers | Main tradeoff | Best fit |
|---|---|---|---|
| Strip lashes | Fast, obvious length and volume | One-piece fit can lift at the corners | A short event and an easy removal plan |
| DIY cluster kit | Customizable placement and smaller sections | Requires patience and careful adhesive control | Occasional wear and a reader comfortable with detail work |
| Salon extensions | Professional application with a longer wear cycle | Higher cost and maintenance appointments | A reader who wants a lower-daily-effort result |
Allure’s kit review is useful for understanding the format, but it does not establish that every user will tolerate the bond. Adhesive ingredients, curing time, and removal method matter. Follow the exact kit directions and test the adhesive on a small area if you have known sensitivities. Never substitute a stronger glue intended for another use.
Build a Clean Application Routine
Clean hands and tools come before placement. The American Academy of Dermatology advises washing makeup brushes every 7 to 10 days and never sharing them. It also recommends rinsing only the tips and drying brushes with the bristles angled downward. A lash applicator is not a brush, but the same principle applies: keep it clean and store it away from moisture and loose powder.
Work in good light with a mirror at eye level. Brush the natural lashes upward, apply the bond only as directed, and place the cluster without touching the eyeball or the inner corner. Start with the shortest length and add volume gradually. If the applicator slips, stop rather than trying to force the cluster into position.
Keep the adhesive away from the waterline and the opening of the eye. Do not apply a cluster if the lid is irritated, the eye is watering heavily, or a contact lens feels uncomfortable. If a product enters the eye, follow the package instructions and seek appropriate medical care rather than rubbing.
Remove Gently and Know the Limits
Use the removal method specified by the kit. A water-removable bond should be softened as directed instead of peeled from dry lashes. Pulling a cluster can remove natural lashes and irritate the lid. Give the bond enough time to loosen, then support the surrounding skin while lifting the cluster gently.
Do not rush removal to get ready for bed. A slow, gentle process is easier on the natural lashes than a quick pull.
The AAD recommends replacing makeup according to the product instructions and stopping products that have changed texture or smell or caused irritation. A lash kit that has been contaminated, stored wet, or shared is not worth another use. The makeup brush cleaning guide covers the broader tool-care routine.
Skip DIY clusters when you have an active eye infection, recent eye surgery, persistent dryness, or a known adhesive allergy. Skip them when the application requires pulling the lid, gluing down the waterline, or using a product without clear removal instructions. A professional lash service or a simpler mascara routine is safer when the eye is already reactive.
The semi-halo eyeliner guide shows how a controlled eye detail can change the overall makeup without covering the entire lid. The winter makeup guide follows the same balance: choose one focal feature and keep the surrounding application clean. If the lash kit creates anxiety, pain, or constant checking, it is not the right feature.
Decide Before You Buy
Compare the kit by cluster count, available lengths, bond and remover instructions, and expiration information. A larger set is not a better value if the adhesive dries out or the lengths do not suit your eye shape. A water-removable system may be easier for occasional use, but it still needs a calm, careful removal.
Do a patch test and a one-cluster trial before a full set. Wear it for a short period at home, not to an event where you cannot remove it comfortably. Check for lifting, itching, redness, or a heavy feeling. If the cluster lifts early, use the recommended remover or warm-water method; do not tug at the base.
The decision rule: choose a kit with clear bond and removal instructions, apply it to clean lashes in good light, start with one small cluster, and stop at the first sign of eye pain or irritation. DIY lashes are a cosmetic option, not a permanent extension or an eye treatment.
Updated November 13, 2026. Written and edited by the BeautyPick Lab editorial team. This article summarizes cited public guidance and editorial coverage and does not represent firsthand testing or medical advice.
Sources
- Allure Editors. Falscara Studio Mini Review. Allure, November 11, 2026.
- American Academy of Dermatology. How to Clean Your Makeup Brushes.
- American Academy of Dermatology. When to Toss Your Makeup and Sunscreen.
